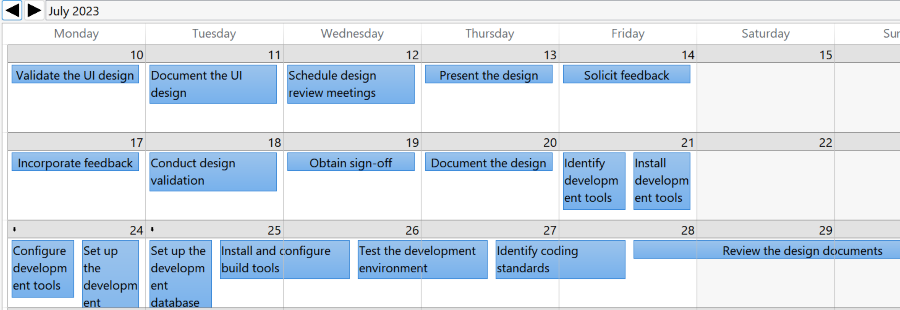
Have you ever wanted to be able to give your team members a calendar view of their tasks for the next week or month? The Gantt chart, though valuable, can sometimes seem too intricate for daily team use. Enter the Calendar view—a simple, intuitive way to showcase tasks. Learn how to set it up in Project and print out a calendar for each member of your project team - help them stay on top of their game!
Table of contents
Video guide to printing the calendar view
Step-by-step guide
Step 1: Access the Task Tab
Begin by opening your Project application. On the main interface, navigate and click on the Task tab.Step 2: Opt for Calendar View
Once you're in the Task tab:- Locate the Calendar option.
- Click on it.
Step 3: Select the Appropriate View and Filter
After accessing the Calendar:- Click on View.
- Then, choose Filter.
Step 4: Apply the Using Resource Filter
Now, it’s time to refine the tasks shown on the calendar:- Apply the built-in filter "Using resource",
- Choose the resource you want to create a calendar for and click OK.

Top tips for formatting the Calendar view
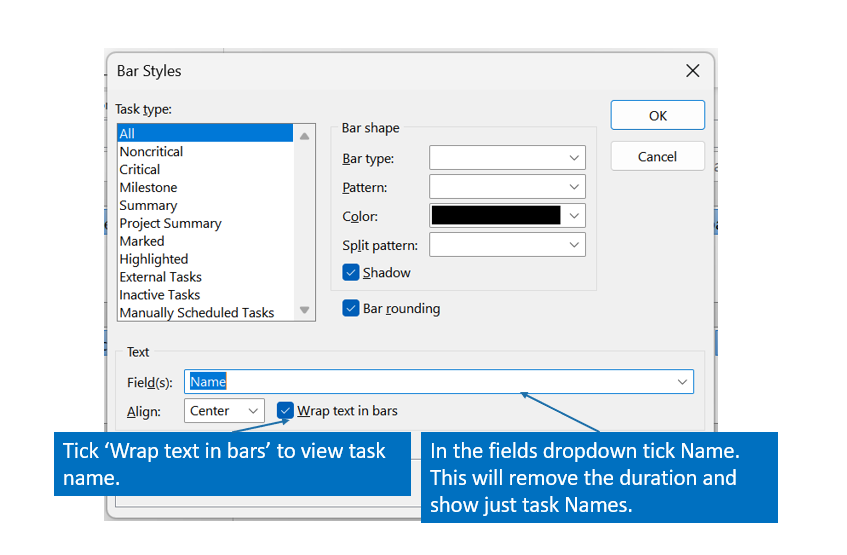
When you first view the calendar it can look confusing with task names cut off and duration shown. You can wrap text so that task names aren't cut off and you can remove task duration.
- In Calendar Format go to Format group and click Bar Styles.
- In the dialog box select Name in the Field(s) menu and
- tick the ‘Wrap text in bars’ box.


Step 6: Printing the Calendar
To print off the Calendar:- Navigate to the File tab.
- Click on Print.
- You will have options to print tasks for specific dates, which can be handy if you want to share tasks for the upcoming week or month. Alternatively, you can choose to print the entire project schedule for the development team.

Now, you're equipped to provide your team with a clear and concise view of their upcoming tasks, ensuring everyone is aligned and informed!

