Table of contents
Video - How to create a To Do list using Microsoft Project
Step-by-step guide to creating the To Do list
Step 1: open Microsoft Project
Open up your project plan in Gantt view.Step 2: Create a New Report
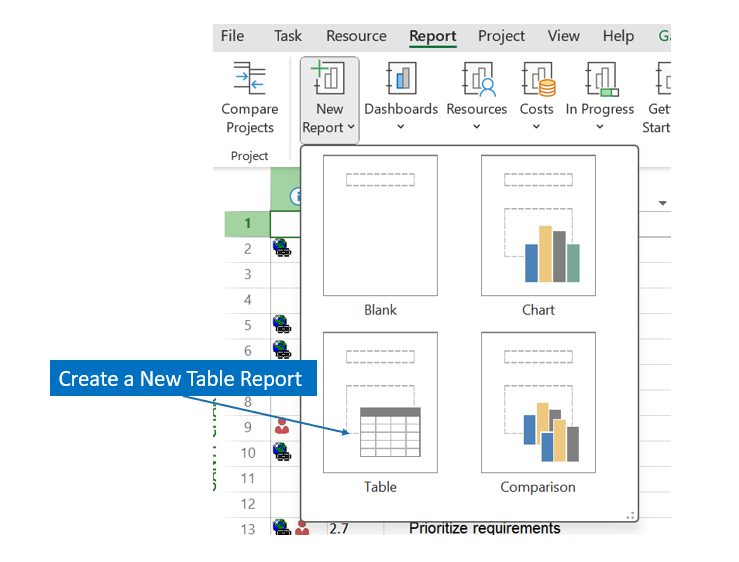
- Navigate to the Report tab.
- Click on New Report.
- Select the Table format for your report.
- Enter a name for your report, e.g., "To-Do List".

Step 3: Setting up the Report View
- On the right-hand side, you'll see the parameters you can add to the report.
- In the main section, you'll have a preview of your report.
- Start by adding Resource Names to your report.
- Set the Outline Level from 'Project Summary' to display All Subtasks.
Step 4: Filtering the Tasks by Resources
- Add a filter to your report based on the resource.
- The preview should now show all tasks for the resource you selected.

Step 5: Filtering the Tasks by Date Range
- If you need to re-open the field list by right-clicking and selecting Show Field List.
- Add a new filter 'Using Resource in Date Range'.
- Select the resource.
- Set the start date by selecting tasks that start after a specific date, e.g., "1st October".
- Set the end date by selecting tasks that finish before a certain date, e.g., "1st January".
- Now, the to-do list will only show tasks that fall within the selected date range.
Step 6: Print or Export the Report
If necessary, you can print off the to-do list for physical distribution or sharing.Top tips for formatting the To-Do list
- Use the Filter ‘Using Resource in Date Range’ to print lists for a specific week, month etc.
- You can drag the table edges to re-size the table and the columns.
- Use the Report Design and Layout tabs to customize the report further. For example, you might use different table colours to differentiate between To-Do lists.
- If the report runs across several pages, you can use header and footer to show the report title and page numbers on every page.
Download the PowerPoint Presentation
For a visual representation and step-by-step walkthrough of this process, click here to download the PowerPoint presentation.This comprehensive guide should help you efficiently create a to-do list tailored to a specific resource.

